The Asset List is where you keep records of your individual assets in Toolminder. You can add new assets the same way as adding new products.
View Assets
Click the 'Asset List' on the 'Home' ribbon menu to show the Asset List window.
Here you will find a list of all recorded assets.
New Asset
The ribbon menu at the top will have automatically changed from 'Home' to 'Record,' under which you will find a 'New' button.
Click it to create a new asset in Toolminder or press Ctrl+N

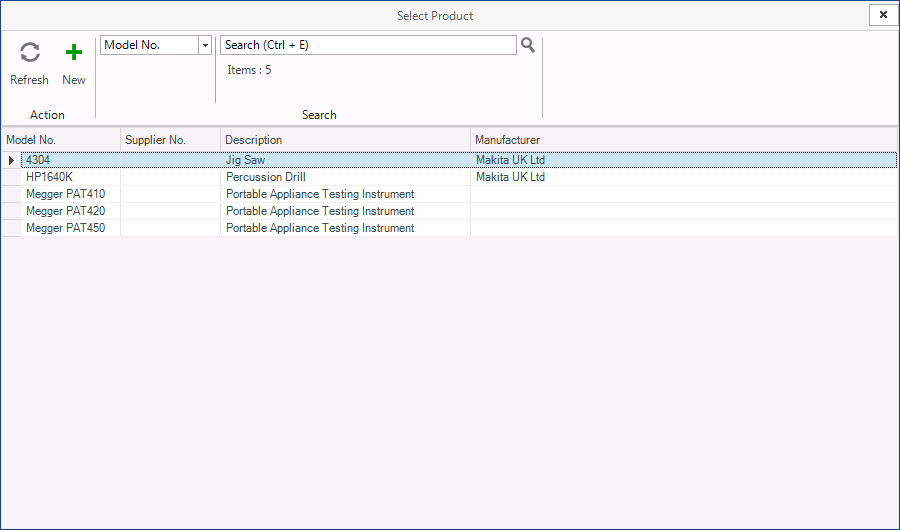
After click 'New' a popup window will appear called 'Select Product'
Select the product record for the asset you are adding, if the product does not exist you can create a new one by clicking the New button.

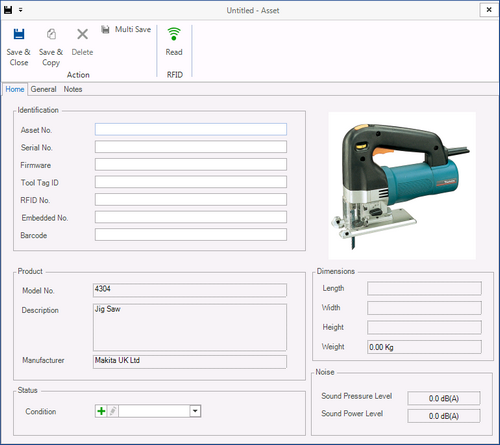
When you have selected the product you can the enter the asset details.

You will see a number of boxes under the 'Identification' section. Here you can include information about the asset such as:
| • | Model No. - connects the asset to a record in the Product Catalogue. |
| • | The Asset No. - the unique identification number issued to the asset. |
| • | Serial No. - the number the Manufacturer assigned to the asset, this may not be unique. |
| • | RFID and barcode - for storing electronic numbers that maybe allocated to the asset using Labels or Tags. |
The Model No. and Asset No. are mandatory and must always been entered.
There are also a number of other tabs in the menu for you to enter further information:
| • | General - The general tab allows the purchasing details of the asset to be stored with its warranty details |
| • | Keeper - Allows the keeper of the asset to assigned. |
| • | Location - Where the asset is located. |
| • | Maintenance - The maintenance schedule of the Asset can be linked to the product defaults, or if required the schedule can be unlinked from the product and defined just for this asset |
When you have completed entering asset details, click Save & Close and the record will be saved.